Hands On Scientific at GE Kids Day
Amongst the animals, costumes, bounce houses, food, and other festivities, there was a booth that promised to show kids some scientific tricks. Now, this could have been a boring booth, avoided by all, but it wasn’t. The demonstrations here not only educated, but were entertaining as well. Best of all, they encouraged the kids to get involved in the experiments and were things we could pretty easily replicate at home.
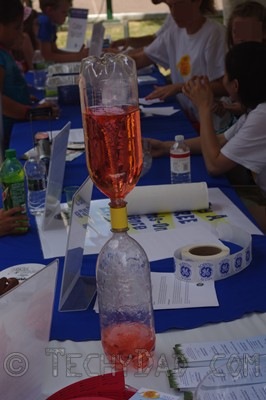
First up was the tornado tube. This is a classic experiment that involves two soda bottles and colored water. One bottle is filled with water and connected to the other, empty bottle. They are turned so that the full bottle is atop the empty one. The bottles are twirled slightly and the water runs from top to bottom. As it does so, though, it forms a vortex, a tornado captured right in your own house.

(NOTE: You can’t simply hold the bottles together. You might be successful, but you’re much more likely to have a spill on your hands. There are special connector pieces that are made just for this very activity.)
After this, we moved on to another soda bottle. This one had a small amount of rubbing alcohol in it, a stopper plugging it up, and was connected to a pump. The boys were told to pump the handle a few times. When they were done, the stopper was removed. All at once, a loud popping noise was heard and the formerly clear bottle was filled with a cloudy substance. There was a cloud in the bottle!

Of course, I knew I wouldn’t be able to convey just how quick this happened using mere photos, so I shot a video of it as well.
How did this happen? Pumping air into the bottle increased the air pressure in the bottle. When the stopper was pulled, that air went rushing out. The sudden drop in air pressure lowers the temperature and the evaporated rubbing alcohol in the bottle condenses. This condensation takes the form of a smoky cloud. (To see how to perform this experiment at home, see here.)
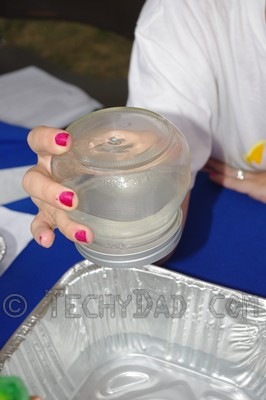
Next up was the water surface tension and cohesion test. In this test a jar with a mesh screen is filled with water. When it is turned over the water pours out. So far, so good. However, if it is filled with water again and an index card is held over the top as it is carefully turned over, the water will remain in place when the card is removed. Yes, the water will seemingly defy gravity and stay up in the air when it seems as though it should fall.

How does it do this? Water forms a membrane between the gaps in the mesh and the surface tension of this membrane keeps the water in. (Weird Science Kids has more on this experiment.)
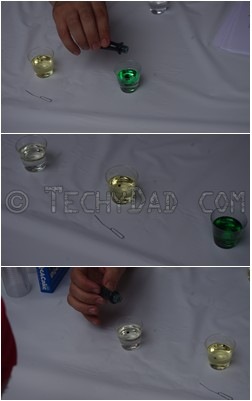
Finally, was the color splash experiment. In this one, there were three small cups: One was filled with water, a second filled with oil and a third had water and oil. This experiment showed how density affects the behavior of liquids. A small drop of water-based food coloring was dropped in the water cup and the cup turned green. Then, a drop was placed in the oil. As expected, it sank to the bottom. It was explained that the water was denser than the oil, it weighed more and thus it sank.
But what about the third cup? In this one, a small amount of oil was floating atop some water. My boys were asked what would happen to the food coloring if it was dropped in there. NHL guessed that it would stay together. Secretly, I "knew" he was wrong and that it would sink to the water layer and then turn the water green. Guess what? I was wrong and NHL was right. NHL even guessed, when prompted, that it was due to the oil.

As the food coloring sank through the oil, it got itself a nice oil coating. This coating kept it from mingling with the water below. Once the food coloring blob was disturbed, though, the oil bubble popped and the color mixed into the water just as before.
All in all, my boys loved these science demonstrations and it is making me wonder what other science demos I can show the boys in my own house.
Have you ever run any cool science experiments at home for your kids? If so, what did they consist of?
